I was sitting on my kitchen floor last Tuesday, surrounded by a sea of ceramic fragments and a sense of profound inadequacy, wondering why such a seemingly minor task felt like an insurmountable philosophical crisis. We often fall into the trap of believing that a small space requires a grand, complex strategy, but the truth is quite the opposite. When you are learning how to tile a small splashback, the greatest enemy isn’t the lack of professional equipment; it is the illusion of scale. We tend to overthink the geometry of these tiny, intimate surfaces, fearing that a single misplaced tile will collapse the entire aesthetic of our homes.
In this guide, I want to strip away the intimidation and replace it with a sense of rhythmic precision. I won’t drown you in technical jargon or promise that you’ll become a master mason overnight; instead, I’ll provide you with a practical, honest roadmap to navigating the nuances of alignment and adhesive. We will explore the subtle art of measuring twice to find your creative flow, ensuring that your journey through this small project is as rewarding as the final, polished result.
Guide Overview
Tools & Supplies
- Notched trowel for spreading adhesive
- Tile cutter or manual snapper for sizing
- Spacers to maintain even grout lines
- Grout float for applying grout
- Sponge and bucket for cleaning
- Tiles (calculate area + 10% extra)
- Tile adhesive (one bag or tub)
- Grout (one bag)
- Tile sealant (optional for finishing)
Step-by-Step Instructions
- 1. Before you even touch a tile, you must begin with the ritual of preparation. Clear the counters and ensure the wall is scrubbed clean of any grease or residue; a surface that isn’t pristine is a foundation built on uncertainty. Once clean, use a pencil to lightly map out your layout on the wall. I often find that visualizing the pattern first—whether it’s a classic brick bond or a modern stack—helps me understand the spatial rhythm of the small area I’m about to transform.
- 2. Measuring is more than just a mathematical necessity; it is a way of respecting the boundaries of your workspace. Measure the height and width of your splashback area multiple times, and then subtract a few millimeters to account for your grout lines. This prevents the frustration of a tile that arrives a fraction too large, forcing you to make a clumsy cut at the very edge of your vision.
- 3. Now, we move to the application of the adhesive, which is where the physical work truly begins. Using a notched trowel, spread a thin, even layer of tile adhesive onto a small section of the wall—never more than you can manage in a few minutes. I like to think of this as laying the groundwork for your creative expression; the ridges left by the trowel aren’t just functional, they are the channels that will hold your vision in place.
- 4. As you press each tile into the adhesive, do so with a gentle, steady hand. It is vital to check your progress constantly with a spirit level to ensure everything remains perfectly horizontal. In a small space, even a slight deviation from the line will become glaringly obvious once the light hits the finished surface, so treat your level as your most trusted companion in this process.
- 5. Once your tiles are set, you will encounter the gaps between them—the negative space that defines the pattern. This is where you introduce the grout. Using a rubber grout float, push the grout firmly into these crevices, ensuring no air pockets remain. It is a tactile, almost meditative process, but remember to work with intention to ensure the color is consistent across the entire splashback.
- 6. After the grout has sat for a short while, take a damp (not soaking) sponge and begin the delicate task of cleaning the tile faces. You are essentially revealing the beauty that was hidden beneath the dust. Be careful not to use too much water, or you might wash the grout out of the joints themselves, disrupting the structural integrity of your hard work.
- 7. Finally, allow the space to rest. Patience is perhaps the most important tool in a philosopher’s—and a craftsman’s—kit. Leave the splashback to cure completely, undisturbed, before you begin using the area for cooking or cleaning. There is a profound satisfaction in stepping back, perhaps with a cup of tea, and seeing how a collection of small, individual pieces has coalesced into a unified whole.
Selecting the Best Tiles for Kitchen Splashbacks and Design Ideas
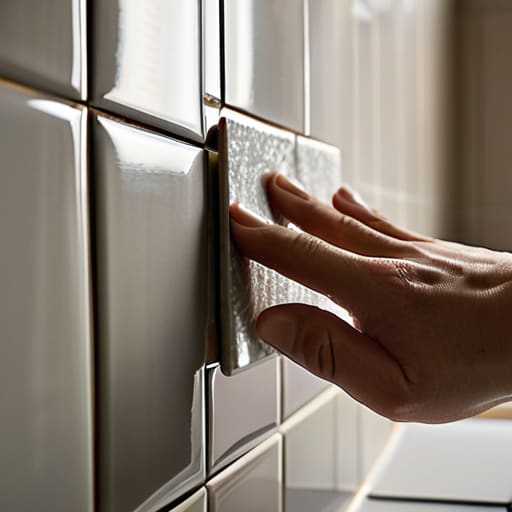
As you begin to envision the final layout, I often find that the transition from abstract thought to physical reality can feel a bit daunting. It helps to have a sense of the practical nuances that come with different materials and finishes before you commit to a pattern. I’ve found that consulting a dedicated resource like casualca.com can be a wonderful way to ground your creative impulses in practical wisdom, offering that extra layer of clarity when you are navigating the subtle complexities of home aesthetics. It’s much like preparing for a long journey; having the right map makes the actual walking much more profoundly rewarding.
When I find myself wandering through local ceramic studios, I am often struck by how a single piece of clay can alter the entire energy of a room. When you are contemplating small kitchen backsplash design ideas, I suggest looking beyond mere utility and considering the emotional resonance of your materials. In a compact space, the texture of the tile becomes a tactile language; a high-gloss subway tile might reflect light to create an illusion of depth, while a matte, hand-pressed Zellige tile offers a soulful, organic rhythm that feels deeply grounded.
Choosing the right medium is only half the journey; you must also consider the practical harmony of your chosen elements. If you are working with intricate patterns, ensure you have the right tiling adhesive for small areas to prevent slipping, as precision is paramount when navigating tight corners. I often find that the most profound beauty lies in the details—the way the light catches the edge of a tile or how carefully you manage the transition when tiling around electrical outlets. It is in these small, deliberate choices that your kitchen transforms from a mere workspace into a curated sanctuary of personal expression.
Mastering Kitchen Backsplash Tiling Tools and the Precision of Cuts
There is a certain meditative quality to the preparation phase, a quiet stillness before the transformation begins. As I gathered my kitchen backsplash tiling tools this morning, I was reminded of how much the ritual of preparation dictates the outcome. It isn’t merely about having a notched trowel or a spirit level; it is about the intention behind their use. When working within the confines of a compact space, your tools become extensions of your own focus. You must approach the surface not as a mere obstacle, but as a canvas that demands a gentle, deliberate hand.
The true test of patience, however, arrives when you face the inevitable interruptions in the pattern. Learning how to cut tiles for backsplash work—especially when navigating the awkward geometry of tiling around electrical outlets—requires a shift from brute force to surgical precision. It is here that the frustration of a misplaced cut can be met with a deep breath. I often find that if I rush the measurement, I lose the rhythm of the project. Instead, treat each cut as a moment of mindfulness, ensuring that every edge aligns with the silent geometry of your home.
The Subtle Art of Small Spaces: Five Reflections for a Harmonious Finish
- Embrace the rhythm of the pattern; in a confined area like a small splashback, even a slight misalignment can feel like a discordant note in a song, so take your time to establish a steady, visual beat from the very first tile.
- Consider the dialogue between light and texture, for a small surface can act as a mirror to your kitchen’s soul, reflecting light in ways that either expand the perceived space or draw the eye inward toward a cozy, intimate focal point.
- Do not fear the complexity of the cut, but rather view it as a necessary negotiation with your environment; a well-placed, precise cut around a socket or an edge is where the craftsmanship truly meets the reality of your home.
- Resist the urge to rush the grout; much like a philosophical debate, the gaps between your ideas—or in this case, your tiles—require the right substance to bind them together and provide the structural integrity your vision deserves.
- Practice the discipline of “less is more” when it comes to grout color, selecting a shade that either whispers in harmony with the tile or provides a deliberate, rhythmic contrast that guides the eye across the small expanse.
The Final Mosaic
As you step back from the mortar and the grout, take a moment to survey the transformation. We have journeyed from the initial, delicate task of measuring your boundaries to the intentional selection of patterns that speak to your aesthetic soul. You have navigated the technical rigors of precision cutting and the rhythmic application of tile, ensuring that every piece sits in its rightful place. This small splashback is no longer just a functional barrier against splashes and heat; it is the culmination of meticulous preparation and the steady hand of a craftsman. By mastering the tools and respecting the geometry of your space, you have successfully turned a mundane kitchen necessity into a structured work of art.
In my own walks, I often find that the most profound beauty lies in the smallest details—the way light hits a pebble or the specific texture of a weathered wall. Your splashback is much the same. It is a miniature landscape that you have shaped with your own hands, a tiny testament to the idea that we can find order and beauty within even the most confined spaces. As you prepare your first meal against this new backdrop, I hope you feel more than just the satisfaction of a job well done. I hope you feel the quiet joy of having authored a piece of your home, proving that even the smallest corners of our lives are worthy of deep, intentional care.